In June 2016, I moved to a new room at work which has an entire whiteboard wall. For the first few weeks the wall was covered in work from the previous team and I wasn’t allowed to touch it. In those weeks my colleagues and I named the room ‘The Chic Suite’ and talked about how we would use the whiteboard wall. We wanted to bring a bit of fun and colour to the room, by drawing around each others bodies. The day we were told we could wipe that wall clean, we did.
One evening when everyone had gone home, I was packing up to leave when I turned and looked at the empty white wall. I decided to write ‘Welcome to The Chic Suite’ in the centre of the wall using different colours, so that when someone came into the room, it would be there right in front of them.

The day after during lunchtime we started to draw around each others bodies. There were only four of us in the room at the time, so we had three of us to the left of the wall on one on the right, with the ‘Welcome to the Chic Suite’ in the middle. Tracing around each other was fun, though the traces were not accurate to our body shapes, one person had a big unnatural hand and another had an extremely slim leg. We just laughed at the figures we’d drawn and didn’t bother changing them as they were unique, like us! We decided to each be a Disney characters, so we had an Alice, Belle, Pocahontas and Aladdin and we all had fun drawing the outfits on each other. The Alice and Belle looked very similar in blue dresses, so to tell them apart, I thought I’d try and draw Lumière (the candle) next to Belle. I found a picture on Google using my phone, grabbed an orange whiteboard pen and started to draw. When I was finished I was really surprised how easy it was and how similar the drawing was to the original picture. I had a sudden urge to do more! So I took to google again to find an image of Meeko (raccoon) for Pocahontas and started drawing. When I’d finished drawing Meeko lunch was nearly over and I had to wait until the end of the day to carry on! That evening I added a Cheshire Cat, I found a picture of the cat lying on a tree branch and as Alice was on the far left of the wall, it was perfect!


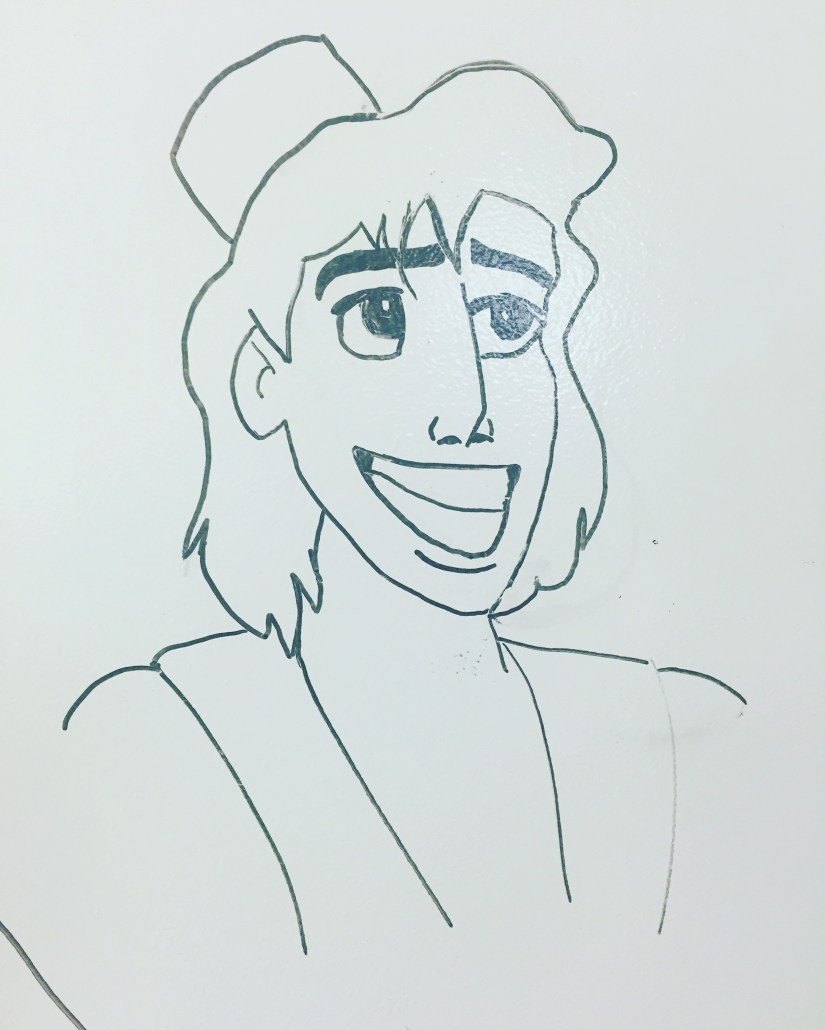
I really had the bug for drawing now, so for the Aladdin (that was the fourth body trace on the right side of the wall), I added Abu (monkey) and the Genies lamp. I also drew Mini Mouse with the words ‘Walt Disney lives here’ underneath, as the wall was pretty much all Disney!


Here’s a picture of the wall (it’s the only one I have!) :

One evening I was curious to see what else I was able to draw and I called a friend to give me a challenge. She asked if I could do the famous drawing of Cosette from Les Misérables. Challenge accepted! The original drawing of Cosette consists of lines, so I started from the top and worked my way down copying every line as close as I could from the picture on my phone. Once I’d gotten to the end of Cosette’s face it had been over an hour and the ink in the pen was becoming faint. I was not leaving until it was finished, so I put the pen in an up right position for fifteen minutes, then continued. I finished the neck by just doing lines and not copying the original as my arm was getting achy. All that was left after that was the hair, which wouldn’t have taken that long to do but the ink was faint and it was past ten o’clock, again I didn’t bother looking at the original image and just drew from memory to get it done. Here it is:

I added a drawing of Aladdin a week or so later, along with a body trace of our fifth team member. This was done underneath the ‘Welcome to the Chic Suite’ and in a sitting pose. This person soon became Esmeralda from the Hunchback of Notre Dame, holding a tambourine and a potato (inside joke relating to the person). Sadly I don’t have a picture! But I have one of the Aladdin:
I’ve made a slideshow of some of the Disney drawings close up!
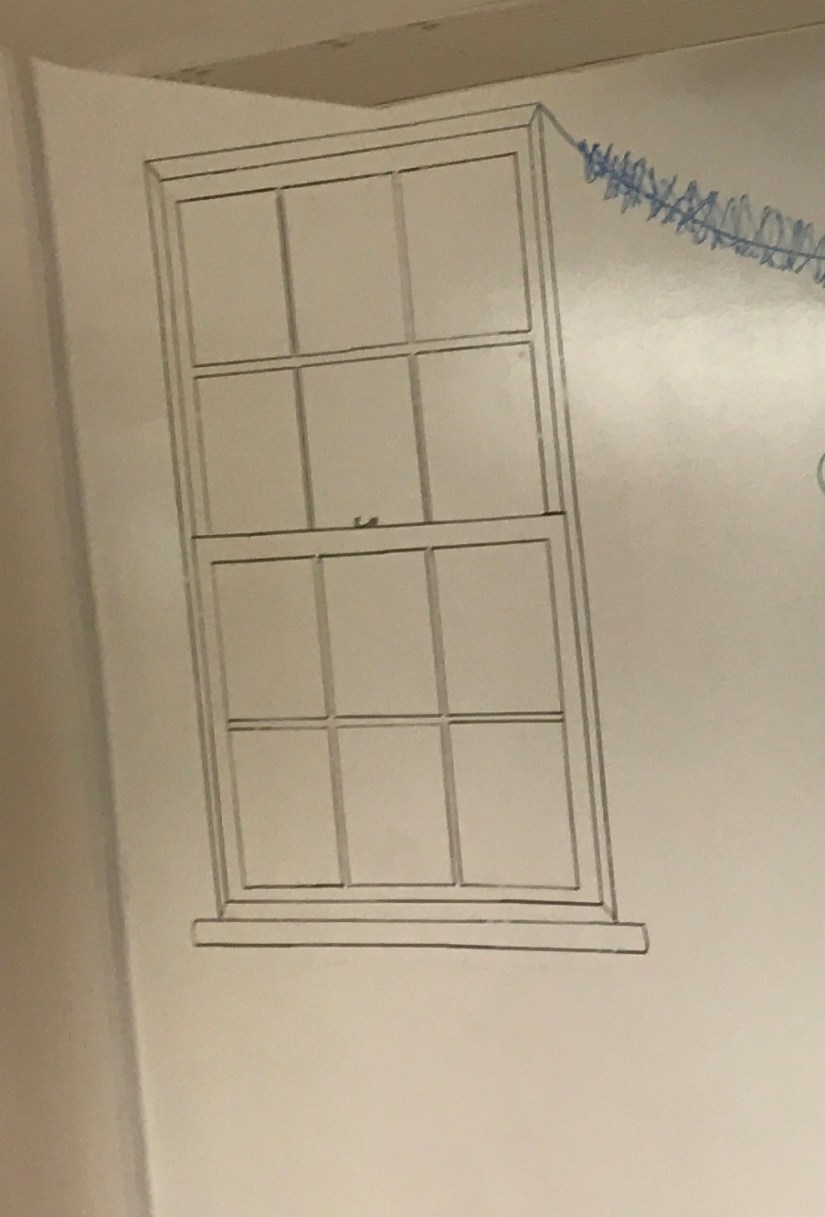
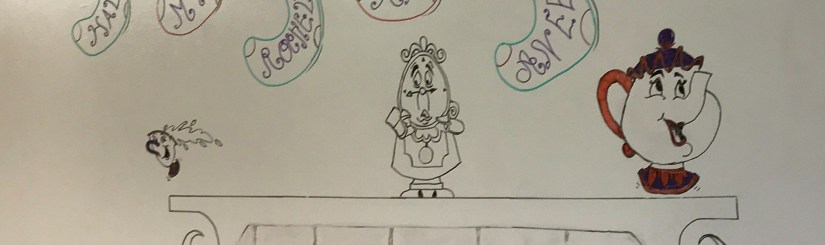
At the beginning of December 2016, I wiped all the drawings off to start fresh. As it was the holiday season and I was feeling festive, I decided to do a Christmas morning! I grabbed a ruler and drew a window, which took me a couple of hours. The next evening I started the stone fireplace. On top of the fireplace I added Clogsworth, Chip and Mrs Potts all from Beauty and the Beast. Overall the Christmas morning took me about four nights to do. The three Disney characters were the only drawings where I had to look at a picture. For the rest of the Christmas morning, I just let my imagination do the work!


I really enjoy drawing and I learned that it was something I never knew I would be good at. I found it very relaxing and for a first, I never got frustrated during any of the drawings. I will carry on drawing on the whiteboard wall, as all the drawings above have now been wiped off and I just need to find the time! When I do have the time, if you would like to challenge me to draw something, comment below and I’ll give it a go! 🙂
RATINGS
- Difficulty scale – I can’t rate this for you but for me it was easy
- Time taken – on going – For the Disney characters it was about 15 minutes each
- Enjoyment –
 LOVE IT
 - Would I do it again? – YES, when I have the time..