
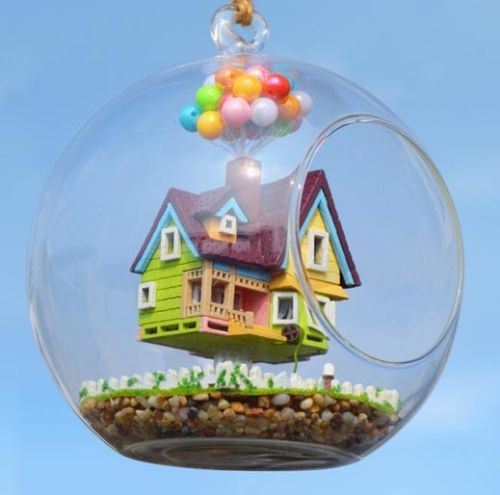
In November 2015 I was browsing online when I came across this beauty:
It looked very easy to make and from reviews online all I needed was some UHU glue and I was good to go. I ordered it from Ebay and it came 3 days later and as soon as I got home from work, I ripped open the box eager to get started!
This is what I got inside the box:
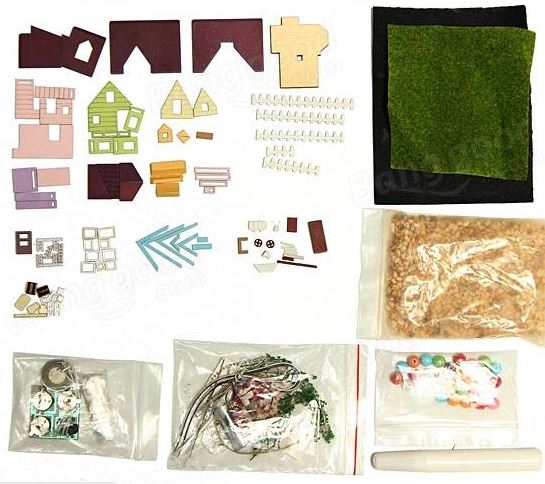
I also bought a Stanley knife, sandpaper, scissors and a ruler.
After an hour of sorting out all the little pieces, I decided to read the manual! There was a lot to take in and I soon realised it was going to be a bit more fiddly than I initially thought.
I started by lightly sanding the edges of the wooden pieces for the house as this would help the glue bond better. Next I then cut out all the wall paper and flooring ready for the inside of the house and stuck them to the correct walls and floors.


After the pieces had dried, the manual then instructed me to do the windows and porch on the front of the house. This consisted of little wooden white squares, that were to be glued on the out side of each wall that had a hole for the window. The main window on the front of the house was more complex and took a very steady hand to put together as it was delicate. I did snap the bottom half but managed to glue it back together, without it being too noticeable! See… 🙂
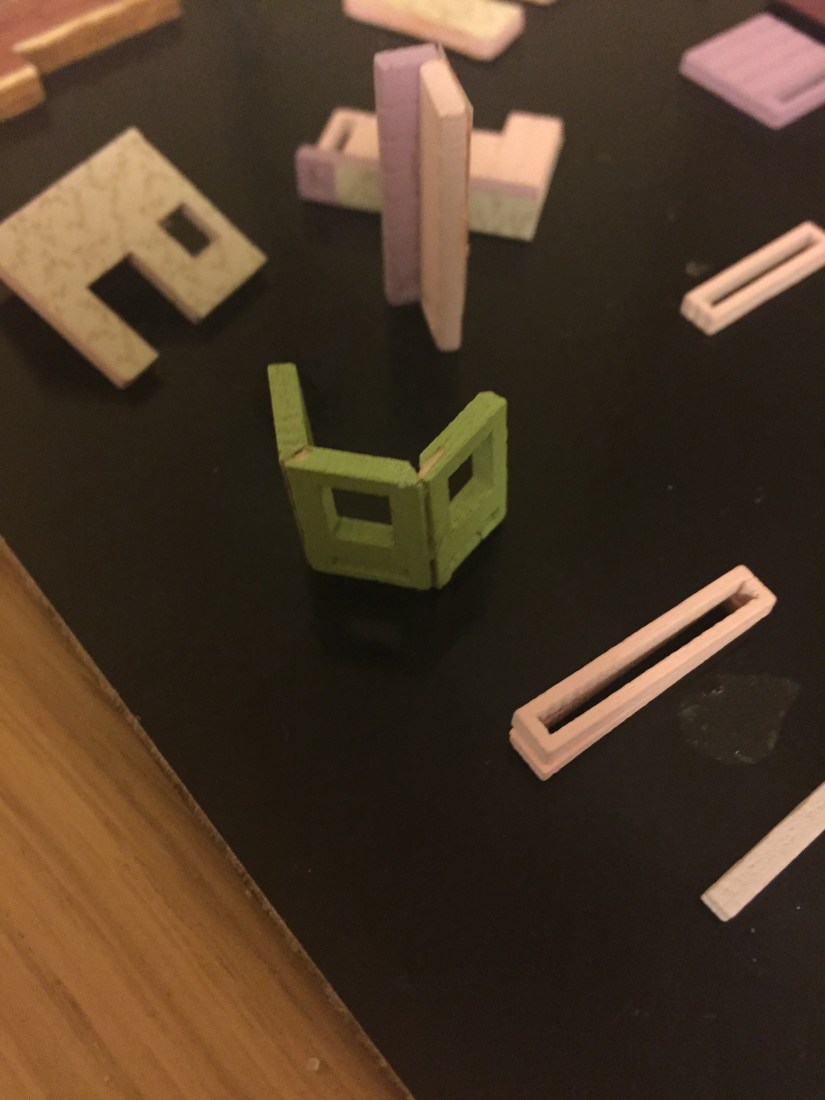
Once the windows were fixed, it was time to glue the four walls onto the main flooring and let dry. When the walls dried I then attached the front porch to the house and the main window. As there are lights to be fitted, it was now time to fit them before the roof was placed on. The lights were easy to insert into the house, though the glue was very noticeable on the walls. The circuit for the lights contained two LED lights as the house has two rooms.
The next part was the furniture! This was the bit I was looking forward to the most, decorating! I must admit, the chairs were so small, that it was very hard to cover the small pieces with fabric. Cutting the little wooden legs took a few goes as they were either uneven or kept breaking in half! Yes, this was very frustrating and I gave up at this point. Though, it was them little legs that made me leave it unfinished on the shelf for 4 months, until I had the motivation to try again.
The other room in the house was the kitchen, The main feature in the kitchen for me is the chandelier, again fiddly, but worth it! Here’s the finished kitchen and living room below:


The roof was simple to assemble and required some sanding to create a fully joined peak at the top of the roof. Once I had glued the roof parts together and added the chimney, I then glued the LED light that’s in the kitchen to the roof, as the manual had instructed. The final piece to be made for the house was the balloons, I couldn’t understand the diagrams in the manual so I just made them up to how I thought they should be. The balloons are made of coloured beads, thin wire and a lot of glue! I used way more glue than I should have and some of the colours from the beads started to run! Ooops!
Now the house was complete and the lights were working, I had to cut a clear tube to be glued underneath the house so that I looks like it’s floating. I tipped 3 quarters of the gravel stones into the bottom of the glass ball and the rest was glued onto the underneath part of the grass. After I had put the grass under the house it was ready to be inserted into the glass ball. This was very easy as the hole is bigger than the house, so it slid straight in! The battery for the lights is then hidden in the stones. The last and final piece was the white picket fence, this of course was very simple to build, 4 strips of wood glued to make a square and then placed over the house.
Here’s the final pictures:


RATINGS
- Difficulty scale – Hard
- Time taken – 5 months (on and off)
- Enjoyment – 🙂 Frustrating at times but pure satisfaction once finished!
- Would I do it again? NO
